Amiga 500 for MEGA65
Experience the Commodore Amiga 500 on your MEGA65!
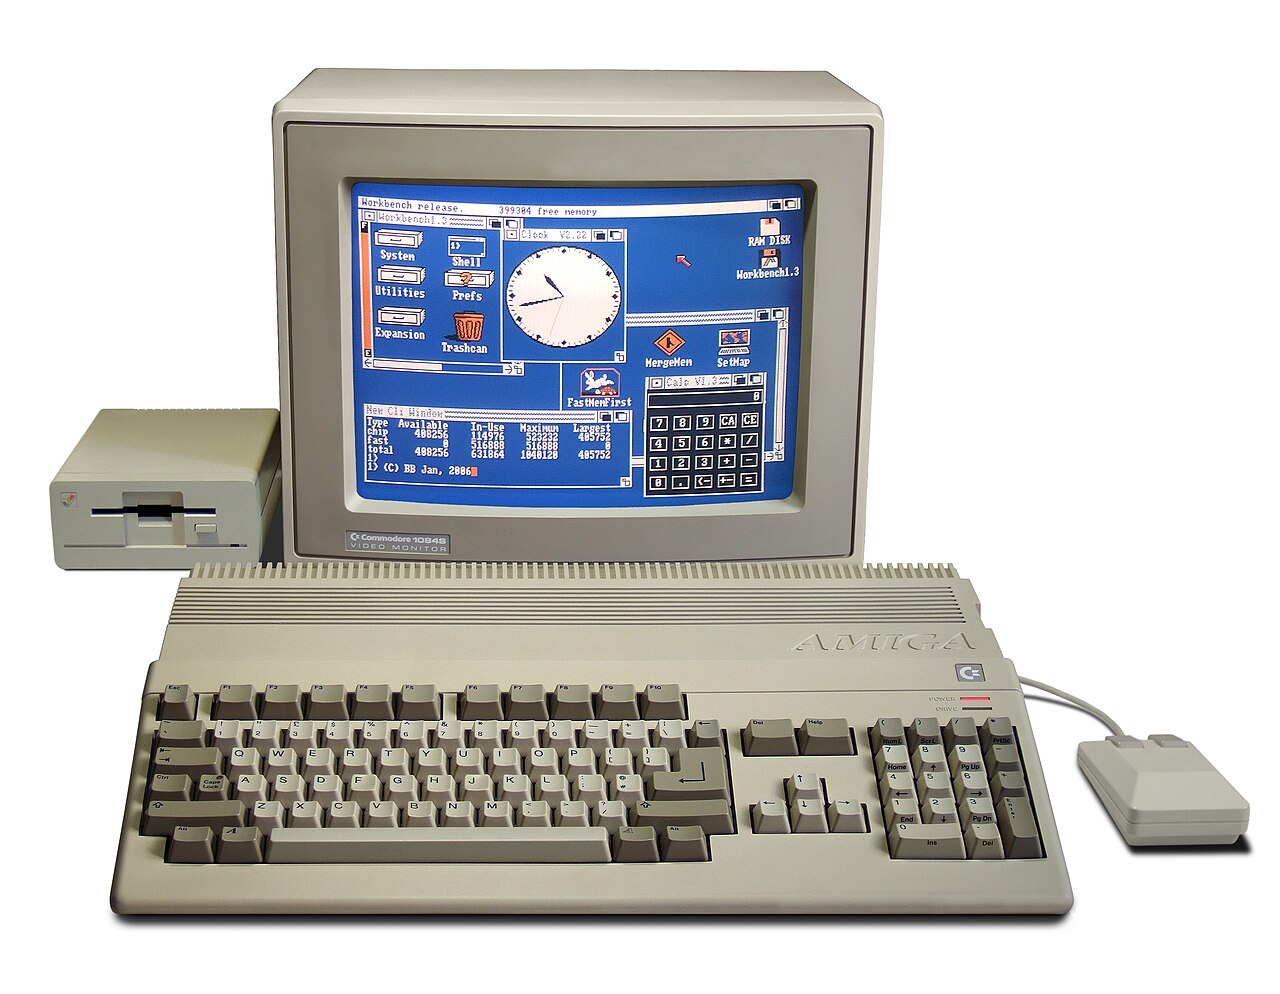
This core turns the MEGA65 into an Amiga 500 with the original OCS chipset (PAL), a cycle accurate 68000 CPU, 512 KB of Chip RAM and a 512 KB memory expansion in the trapdoor slot (known as Slow RAM, this is what the classic Commodore A501 expansion did). The Amiga therefore has 1 MB of RAM in total.
And the MEGA65's built-in floppy drive becomes a real Amiga drive: put in a genuine Amiga disk, and the Amiga reads and writes it, copy-protected originals included.
Beta 2 for Version 2
We are currently beta testing Version 2 of the core. It would be great if you supported our efforts and used Beta 2 for Version 2 instead of the official stable version.
The core is feature complete and, as far as we can assess, rock solid: it runs 99.9% of all games and demos.
Credits
- This core is based on the Minimig-AGA core of the MiSTer project. Minimig was originally created by Dennis van Weeren and has been improved by many others over the years.
- The CPU is fx68k by Jorge Cwik, a cycle accurate implementation of the 68000.
- sy2002 ported the core to the MEGA65 in 2026.
- The core uses the MiSTer2MEGA65 framework and QNICE-FPGA for FAT32 support (loading the Kickstart ROM, mounting disks) and for the on-screen-menu.
Features
- Amiga 500, OCS chipset, PAL
- Kickstart 1.3
- Cycle accurate 68000 CPU
- 512 KB Chip RAM plus 512 KB Slow RAM (trapdoor expansion), 1 MB in total; the Slow RAM can be switched off in the menu for the few games that need a chip-RAM-only A500
- Real Amiga disks: the MEGA65's built-in 3.5" drive reads and writes genuine Amiga disks, copy-protected originals included, and real Amigas read the disks it writes
- Up to three floppy drives (
df0:,df1:,df2:; one by default), each a read/write 880 KB*.adfdisk image or the built-in drive - Real Amiga mouse in port 1, joystick in port 2, exactly like on a real Amiga — and either device works in either port, so dual-mouse and two-player (two-joystick) setups work too
- MEGA65 keyboard mapped to the Amiga keyboard and raw Amiga keyboard mode
- Interlace ("laced") modes with a built-in flicker fixer on HDMI
- HDMI: flicker-free smooth motion, several resolutions and scaling filters, and a DVI mode for displays that do not accept HDMI
- Analog output in parallel to HDMI: scandoubled 31 kHz VGA or raw 15 kHz RGB for CRTs (SCART), selectable in the menu
- Adjustable picture, per Amiga screen mode: HDMI crop plus analog position (pan) and analog overscan, via a config file and helper tool
- Authentic A500 sound: A500 and LED filters, stereo mix and master volume
- Battery-backed real-time clock
Kickstart ROM
The core needs the Kickstart 1.3 ROM (revision 34.5, the 256 KB version that shipped with the Amiga 500). Put it on your SD card as
/amiga/kick.rom
as a raw dump of exactly 256 KB (262,144 bytes), no byte swapping. Without this file the core stops with an error message. Kickstart is copyrighted software, so it is not part of this repository or of any release; you need to obtain a legal copy yourself, for example from Cloanto's Amiga Forever.
Slow RAM (A501)
A few programs, typically early games, do not work on an Amiga with expansion RAM: they put their graphics into the expansion memory, which the Amiga's custom chips cannot display. Rogue is an example: with Slow RAM switched on it fails to draw the dungeon and the player. On a real A500 the fix was to pull the trapdoor card out of the machine; here it is a menu item. Open the menu with Help and deselect Slow RAM (A501): the Amiga reboots as a 512 KB chip-RAM-only A500, and the expansion memory area behaves exactly as on a machine without the trapdoor card. The setting is remembered, so switch it back on for software that wants the full 1 MB. The battery-backed real-time clock, on real hardware part of the A501, stays available either way.
Floppy disks
AExp gives the Amiga up to three floppy drives: df0:, df1: and df2:.
Each one is either a disk image (an *.adf file on your SD card), the
Hardware Floppy (the MEGA65's own internal 3.5" drive, reading and writing
genuine Amiga disks), or switched off. You choose how many drives exist and
what each one is in the Drive Settings submenu of the options menu; a
change there cold-boots the Amiga, because it detects its drives only at
startup. Out of the box you get one: df0: as a disk image drive. df1:
and df2: are off, and no drive is the Hardware Floppy, because a number of
games and demos misbehave when the Amiga sees more than one drive. Switch
the others on when you need them.
Press Help to open the menu, which shows one line per existing
drive: a disk image drive shows the mounted file name or <Load> when it is
empty, a Hardware Floppy drive shows that instead. Move the highlight to a
disk image drive and press Space to open the file browser and
mount a *.adf image; a disk in df0: boots after mounting. On a drive
that already holds a disk, that same Space ejects it, so one
key both mounts and ejects.
Disks are read/write: when the Amiga writes to a disk (saving a file,
formatting, storing a high score), the change is written back to the
*.adf file on your SD card. The same *.adf file cannot sit in two drives
at the same time; the core refuses the second mount. Each drive keeps its
own copy of the disk and collects its own changes, so whichever drive saved
last would quietly overwrite what the other one saved. If a program wants
two disks, give it two files.
Saving happens in the background, so the Amiga never stalls. The MEGA65's
drive LED lights green during disk access (reading or writing), like the
drive light on a real Amiga. After a write it turns yellow while the
change is being written back to the *.adf file on the SD card, and goes
off once everything is saved. Please wait until the LED has stayed
off for a few seconds before you unmount a disk, swap disks, reset, or switch
the machine off: the yellow light can briefly come back on as more data is
flushed. Switching off while it is yellow loses the unsaved changes, just as
ejecting a real floppy while its drive light is on would.
The Hardware Floppy makes the MEGA65's built-in drive behave like a real Amiga drive: you put a genuine Amiga disk into the MEGA65 and the simulated Amiga reads and writes it. Originals boot, including copy-protected ones such as the widespread Copylock scheme by Rob Northen Computing (Cannon Fodder, The Chaos Engine, Terminator 2), and so do custom trackloader formats that never used AmigaDOS. Disks the core writes are read by real Amigas: an A500, an A500+ and an A1200 have all read back disks written here, including a bootable Workbench disk cloned end to end.
It needs double-density (DD) media, which is what Amiga disks are; a PC-style mechanism physically cannot read Amiga HD disks. Because writing is real, the disk's own write-protect tab is the only thing protecting it: slide the tab open on anything irreplaceable before it goes near the slot. Only one drive can have the Hardware Floppy, since there is only one mechanism.
The complete guide to the drives is in doc/drives.md, and doc/hardware_floppy.md explains reading and writing real Amiga disks, copy protection, and what to expect from thirty-year-old media.
Mouse and joystick
Plug the mouse into port 1 and the joystick into port 2, as on a real Amiga. Both ports accept either device, so a mouse in each port, or a joystick in each port for two-player games, works as well. The original Amiga "Tank Mouse" is the directly supported passive mouse; compatible active adapters are listed below. Commodore C64 mice do not work: neither the 1350 ("joystick mouse") nor the 1351 (proportional mouse) speaks the Amiga's protocol. We may add support for them in a future version.
The Amiga Tank Mouse works out of the box: movement and the left button behave as on the original machine.
The right mouse button (in Workbench it pulls down the menu bar) is different. On a real Amiga the mouse signals it on a special line that the Amiga's Paula chip actively drives high. The MEGA65 can only read that line, not drive it, so it cannot sense the right button of an original Tank Mouse. This is a hardware property, identical on every MEGA65 model from R3 to R6. The built-in substitute always works: hold the Run/Stop key as the right mouse button (hold it while moving the mouse to open the Workbench menus). This applies to the MEGA65 keyboard mode. In the positional Amiga keyboard mode the substitute moves to the ↑ symbol key (left of RESTORE), because there Run/Stop is the Amiga's Esc. Both keyboard modes are summarized in the Keyboard section below.
So what works depends on what you plug in:
| What you use | Move + left button | Right / middle buttons |
|---|---|---|
| Original Amiga "Tank" Mouse | Yes | Right via Run/Stop; no middle |
| Original Amiga "Tank" Mouse with DIY adapter (see below) | Yes | Yes |
| Adapter that actively drives the line (e.g. Micro Tom, USBAMI) | Yes | Yes |
| Faithful Tank Mouse replica that actively drives the line (e.g. Alfa Data MegaMouse 400, Amitech Amiga Mouse, Amigakit Mouse) | Yes | Yes |
| mouSTer in Amiga-mouse mode | Yes | Yes(*) |
| Commodore 1350 (C64 "joystick mouse") | No | No (maybe supported later) |
| Commodore 1351 (C64 "proportional mouse") | No | No (maybe supported later) |
(*) The mouSTer emulates a real tank mouse so faithfully that it has the
same limitation. You need
firmware version 3.23.5313
or newer, which supports the setting activepotlines=true in the [mouse]
section. With it, the right button of your mouse works; without it, use
Run/Stop. Here is a known-to-work
MOUSTER.INI.
A simple DIY adapter makes the right button work, even with an original Tank Mouse. The only missing piece is the pull-up that a real Amiga's Paula chip provides, and you can add it externally: build a straight-through DB9 male-to-female passthrough (all nine pins wired 1:1) and solder two resistors inside the shell, roughly 2 kΩ from pin 7 (+5V) to pin 9 (right button) and another 2 kΩ from pin 7 to pin 5 (middle button). With that adapter in line, the right (and middle) button of any faithful passive mouse works natively.
If you unplug an actively-driving adapter while the Amiga is running, the right button can stay "stuck" for up to half a minute (Workbench shows its menu bar and stops redrawing) before it clears on its own.
No mouse? Drive the pointer from the keyboard
Without an Amiga mouse or adapter you can still operate Workbench. The Amiga's operating system can move the mouse pointer from the keyboard, and that works on this core too. The feature belongs to Intuition (the Amiga's windowing system), so it is available in Workbench and other OS-friendly programs, but not in games or demos that take over the machine.
The MEGA65 keys map onto the Amiga's built-in combinations like this:
| Action | Keys |
|---|---|
| Move the pointer | MEGA + ↑ ↓ ← → |
| Move the pointer faster | MEGA + Shift + ↑ ↓ ← → |
| Left mouse button | MEGA + Alt (Amiga mode: MEGA + F13) |
| Right mouse button | Run/Stop (Amiga mode: ↑ key) |
MEGA is the Amiga's left Amiga key and Alt is its left Alt, so MEGA + Alt is the Amiga's built-in "left click". (In the positional Amiga keyboard mode the left Alt key moves to F13, so use MEGA + F13 there.) The pointer keeps accelerating the longer you hold an arrow, so tap the keys for fine positioning and hold them to cross the screen.
Keyboard
The menu's Keyboard section offers two mapping modes:
- MEGA65 mode (default), the cap is law: you get the character
printed on the MEGA65 keycap, including the front-face symbols typed with
MEGA (so
{is MEGA+:,~is MEGA+,, and so on). Best if the MEGA65 is the keyboard you know. - Amiga mode, positional: each key sends the Amiga key in the same place on a real Amiga keyboard, so the shifted number row and a few punctuation keys follow the Amiga's own labels. Best for Amiga muscle memory and for games such as Pinball Dreams that require the original Amiga mapping.
The most important keys (meanings for the default MEGA65 mode; where Amiga mode differs, the right column says so):
| MEGA65 keyboard | Amiga |
|---|---|
| MEGA | Left Amiga; in MEGA65 mode it also selects front-face symbols |
| CTRL + MEGA + RESTORE | Ctrl + Left Amiga + Right Amiga (reset) |
| RESTORE | Right Amiga · Amiga mode: Right Alt |
| Run/Stop | Right mouse button, hold · Amiga mode: Esc |
| F1 F3 F5 F7 F9 | F1, F3, F5, F7, F9 (MEGA65 mode) |
| Shift + F1/F3/F5/F7/F9 | F2, F4, F6, F8, F10 (MEGA65 mode) |
| Top row from Run/Stop through F11 | Esc, F1–F10 (Amiga mode) |
| Help | Amiga Help; default menu key |
In the default MEGA65 mode Esc, Tab and Caps Lock work as expected. In Amiga mode the entire top row is positional (Run/Stop is Esc, Esc is F1, Alt is F2, Caps Lock is F3 … F11 is F10), the right mouse button moves to the ↑ symbol key (left of RESTORE), and F13 becomes Left Alt. The full per-key breakdown is in the guide below.
By default Help opens the menu. In the Keyboard menu you can move the menu to F11, F13 or MEGA+Run/Stop, which leaves Help to the Amiga alone. In MEGA65 mode, F11 and F13 are clean menu keys that send nothing to the Amiga. In Amiga mode they also send F10 and Left Alt respectively; see the guide for the effect of every menu-key choice.
The full keyboard guide, with per-mode tables for typing, special keys, menu keys and steering the mouse from the keyboard, is in doc/keyboard.md.
Video: HDMI
HDMI outputs 720p at 50 Hz (16:9) by default. The first HDMI: menu
entry offers the other 50 Hz modes (576p at 50 Hz in 4:3 or 5:4) and the
DVI switch for displays that show nothing at all (see the end of this
section).
An OCS PAL Amiga is a 50 Hz machine, so only faithful 50 Hz modes are offered.
The second HDMI: menu entry, directly below the display mode, selects
the scaling filter:
| Filter | Look |
|---|---|
| No Filter | nearest neighbor: maximum sharpness, visible pixel stairs |
| Sharp Bilinear | pixel sharp, but with softened stair edges |
| Bicubic | smooth all-round interpolation |
| Smooth | soft polyphase scaling |
| Lanczos | crisp polyphase scaling; the default |
| Scanlines | Lanczos plus visible scanlines |
| CRT (S-Video) | scanlines plus a slightly softened picture, like S-Video |
| CRT (Composite) | scanlines plus heavy horizontal blur, like an antenna or composite cable |
The next two features both fight "flicker", but different kinds: the shimmer of interlaced screens, and a periodic hitch in smooth motion.
Interlace flicker fixer (automatic)
Laced screens such as the 640x512 Workbench or the interlaced pictures that demos love are woven into a stable, full-resolution HDMI picture, the same job the A3000's "Amber" chip or an Indivision does on real hardware. This runs automatically; there is no menu entry for it. Demos that flicker on purpose (alternating two images at 50 Hz to fake extra colors, transparency or glowing lights) keep flickering: that is the intended look, and only a CRT softens it.
Flicker-free: smooth motion (menu entry)
The third HDMI: menu entry, Flicker-free (on by default), keeps
motion on HDMI smooth. An Amiga runs a hair below 50 Hz while HDMI is locked
to exactly 50 Hz, so without correction the picture drops or repeats one
frame roughly every twelve seconds: a small judder or tear, most visible on
horizontal scrollers. Flicker-free speeds up the Amiga clock by a fraction
of a percent so its frame rate averages exactly 50 Hz and the seam
disappears. Turn it off for the analog VGA / 15 kHz outputs: there it
would make the sync frequency step, which analog monitors dislike. (With it
on, the machine also runs about 0.16 % fast, so software clocks gain a few
seconds per hour; turn it off if you need authentic timing.)
Latency on the Checkmate Retro Monitor
The Checkmate appears to use a native 60 Hz panel and introduces considerable latency when displaying the 50 Hz output of our PAL AExp core, although scrolling remains smooth with Flicker-free enabled. We suspect that the latency comes from the internal conversion required to display a 50 Hz signal on a 60 Hz panel. Deft recorded several videos demonstrating the effect (click here), comparing the Checkmate with a 15 kHz analog monitor and a Samsung HDMI monitor in Gaming Mode, which adds almost no HDMI latency.
DVI (no sound): when the screen stays black
An HDMI cable carries more than pixels. In the gaps between the visible lines it also sends "data islands": the sound, and small packets that describe the picture to the display. Not every display wants them. A DVI monitor behind a passive HDMI-to-DVI adapter cannot decode them at all, and some older monitors, cheap scalers and capture boxes reject the whole stream instead of ignoring the parts they do not understand. The symptoms are a black screen, a "no signal" or "unsupported format" message, or a picture that keeps dropping out, while the same core runs fine on a different display.
DVI (no sound), at the bottom of the first HDMI: menu just above
Back to main menu, strips the signal down to plain DVI: the pixels, the
timing and the resolution stay as they were, and only the sound and those
extra packets disappear. As the name says, you lose the sound over the
cable; the MEGA65's 3.5 mm audio jack carries the same audio at the same
time.
Leave it off unless you need it. And if you do need it, your display is showing nothing right now, so here is how to switch it on blind. Turn the MEGA65 off and on first, so the menu starts from a known state, and then, as soon as the core has started, press your menu key — Help unless you reassigned it in the Keyboard menu:
- Help — opens the menu, with the cursor on the topmost
dfN:disk-image line, or on Drive Settings if no drive is a disk image. - ↓ ↓ — past Drive Settings, onto the
first
HDMI:line. That is one ↓ per drive you have set to Disk Image, plus one for Drive Settings — two at the factory default. - Return — opens the HDMI menu, cursor on 720p 50 Hz 16:9.
- ↓ ↓ ↓ — past the two 576p modes, onto DVI (no sound).
- Return — DVI is on, and the picture should appear.
- Help — closes the menu and saves the setting.
If the aexp-<version>.cfg file is on your SD card (step 3 of the
installation), you only have to do this once: the choice is stored there and
the core comes up in DVI mode from then on. Without that file the setting is
lost at every power-off, so it is worth copying in.
Two things decide whether those key counts are right. The menu remembers
where the cursor was, so the sequence only works the first time you open
it after switching the machine on — that is what the power cycle is for. And
step 2 follows your drive configuration: only a drive set to Disk Image
has a line the cursor can land on, so it adds one ↓, while a
drive set to Hardware Floppy shows a status line that the cursor skips
and a drive set to Off shows nothing at all. Neither adds a
↓. If df0: itself is the Hardware Floppy, step 2 is a
single ↓.
Video: VGA port (analog RGB)
The VGA connector always carries the picture in parallel to HDMI. The
VGA: menu selects one of three modes:
- Standard (default): the Amiga's 15.6 kHz picture is line-doubled to 31 kHz so that VGA monitors accept it. It is still a 50 Hz signal, which not every flat panel accepts.
- 15 kHz with HS/VS: the raw 15.6 kHz RGB signal with separate horizontal and vertical sync, for retro monitors with a VGA-style input.
- 15 kHz with CSYNC: the raw 15.6 kHz RGB signal with composite sync, which is what RGB SCART cables and most CRT setups expect.
On a 15 kHz CRT you get the most authentic Amiga picture possible: interlace is displayed natively by the tube (no flicker fixer needed) and the intentional flicker effects of demos blend on the phosphor as their authors intended.
For how to connect real CRT monitors (BNC, SCART and DB9 RGB), including important safety cautions, see doc/retrotubes.md.
The on-screen menu is oversized in both raw 15 kHz modes. Open the
OSM: 100% menu entry (the percentage changes with your selection) and
choose a smaller size, down to 50%, until the menu fits your display
comfortably. This changes only the menu, not the Amiga picture. The setting
is global, so it also changes the menu size on HDMI and in Standard VGA mode.
Careful: a regular VGA monitor shows no picture at all in the 15 kHz modes, not even the on-screen menu. If you locked yourself out, connect an HDMI display and switch back there; both outputs share the same menu.
Screen adjustment
The Amiga's picture may not sit perfectly on your screen, an old quirk that
every faithful Amiga recreation shares. Put a small aexp_screen.cfg file
into /amiga, and the core adjusts the picture automatically per Amiga
screen mode. Three independent controls are
available: HDMI crop re-frames the picture on HDMI; analog position
moves the complete analog picture (OSM included) left/right/up/down in all
three VGA modes; analog overscan hides or reveals the Amiga border edges,
which some demos fill with odd-looking material. Two ready-made files ship
with the core (one for 16:9 displays, one tuned like a 4:3 monitor); pick the
one that looks best, or fine-tune your own with the included
aexp_screen_cfg.py tool. The full guide is in
doc/screen_adjust.md.
Audio
Audio plays on HDMI and on the 3.5 mm jack at the same time, unless you switch on DVI (no sound), which drops the HDMI audio and leaves the jack. By default AExp sounds like a real A500: the machine's fixed output filter and its software-switchable "LED filter" are both simulated, and the options menu adds a loudness-true master volume plus a stereo mix that makes hard-panned Amiga music pleasant on headphones. The details, including why a sound filter is coupled to the power LED, are in doc/audio.md.
Real-time clock
AExp can feed the Amiga the MEGA65's own battery-backed clock, so Workbench shows the real date and time and your files get proper timestamps. Setup takes a minute. Kickstart 1.3 has two quirks: the year can come out as 1978, and the time can be an hour off. Both have simple fixes, and neither is a fault of AExp. The full walkthrough is in doc/RTC.md.
Constraints and roadmap
The core is a faithful Amiga 500 by design, so these known gaps, among others, remain:
- Kickstart ROM size limited to 256 KB, so no Kickstart newer than 1.3.x
- No hard disk support
- OCS and PAL only: no ECS, no AGA, no NTSC, no Fast RAM
The development history, with all alpha and beta work-in-progress builds, is documented in doc/inofficial.md.
Installation
To install the core you need its *.cor file (or a *.bit file if you flash
via JTAG). Then:
- Use a FAT32 formatted SD card with a maximum capacity of 32 GB. The card in the back slot has precedence over the card in the bottom slot.
- Copy the Kickstart ROM to
/amiga/kick.romas described above. - Optional: copy the
aexp-<version>.cfgfile that comes with the build into/amigaso that the core remembers your menu settings. Without the file nothing breaks, your settings are just not saved. The file name contains the core version, so after an upgrade you need the matching file and need to re-select your settings once. - Optional: copy the
aexp_screen.cfgfile into/amigaand the core adjusts the picture, automatically per Amiga screen mode. - Put your
*.adfdisk images into/amiga, the file browser starts there. - Flash the
*.corfile using the MEGA65's bitstream utility, or, if you have a JTAG adaptor, load the*.bitfile directly with the M65 tool:m65 -q yourbitstream.bit. - Press Help as soon as the core is running to mount a disk and to configure the core.
If something does not work as expected, see the FAQ.
Developers
Want to build the core from source? In doc/developers.md
you will find the whole path from a fresh clone to a *.cor file. This core
is built on the MiSTer2MEGA65 (M2M)
framework, whose Wiki is the
authoritative reference for the build environment and its
operating-system specific details.