Using Retro Cathode Ray Tubes
The Amiga 500 core is capable of providing analog retro signals via the VGA port that have a 15 kHz horizontal frequency and that either use a horizontal+vertical synchronization signal or a composite synchronization signal. The signal itself is a component signal.
On a 15 kHz CRT you get the most authentic Amiga picture possible: interlace is displayed natively by the tube (no flicker fixer involved) and the intentional flicker effects of demos melt on the phosphor exactly as their authors intended.
Important cautions: ignoring these rules can destroy your retro device.
-
Only connect a retro device while having the 15 kHz retro VGA mode active. Never connect using the "Standard" mode, which yields 31 kHz. High horizontal frequencies damage the cathode ray tube.
-
Always use the right cable. Particularly when you use SCART, the voltages need to be correct and therefore you need to buy a cable with a built-in resistor.
-
When using retro gear via the MEGA65's VGA port: Make sure that you disable HDMI: Flicker-free. Flicker-free makes the horizontal sync frequency step slightly, which analog monitors dislike. Learn more in the user's manual.
Configuring the Amiga 500 core
Configure the core before you connect your retro monitor:
-
Open the on-screen-menu and enter the
VGA:submenu. Select 15 kHz with CSYNC for SCART, DB9 RGB and most BNC setups, or 15 kHz with HS/VS if your device expects separate horizontal and vertical synchronization signals (for example some projectors, plasma TVs and multisync monitors). The three VGA modes are described in the user's manual. -
Turn off HDMI: Flicker-free.
Important: switch from the Standard mode to a retro 15 kHz mode before turning on the CRT. A 31 kHz signal can damage the monitor.
Helpful hints:
-
The on-screen-menu is oversized in both raw 15 kHz modes. Use the
OSM: 100%menu entry (the percentage changes with your selection) to choose a smaller size until the menu fits your tube comfortably. -
A regular VGA monitor shows no picture at all in the 15 kHz modes, not even the on-screen menu. If you locked yourself out, connect an HDMI display and switch back there; both outputs share the same menu.
-
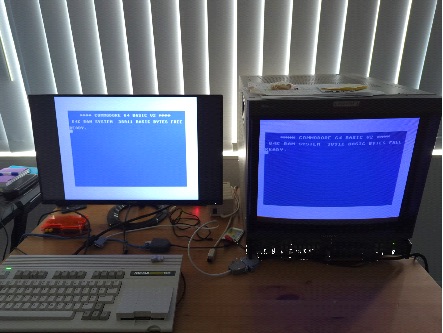
Since the HDMI output always runs in parallel, a second HDMI display is useful for making the necessary adjustments to the configuration (see Example setup).
-
To move the picture on your tube or to hide ugly border artifacts that some demos and games produce, use the analog position and analog overscan features described in Screen adjustment.
BNC
VGA to BNC cable
To connect high-end or broadcast/production monitors with BNC connectors for RGB, you will require a VGA Plug to 5 BNC RGB Male Plugs Video Cable. However, if you're using it for retro RGB video, connecting 4 plugs should suffice unless you're connecting to a projector or plasma TV that requires separate horizontal and vertical syncing signals. The Amiga 500 core also supports this mode over 15 kHz ("15 kHz with HS/VS"), making it a useful cable to have.
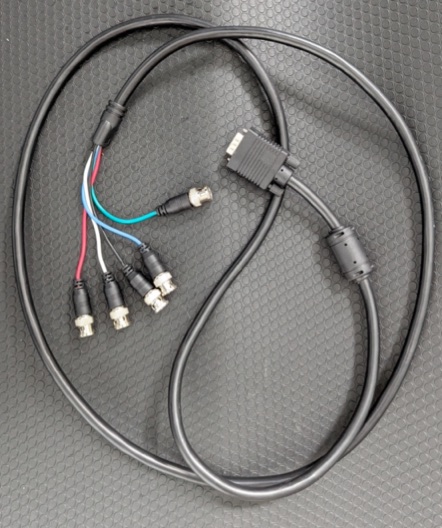
Cable and connection details
To set up retro RGB, you'll need three RGB signals along with CSYNC. In the case of the Amiga 500 core, the horizontal sync will be used as CSYNC. For CSYNC, you can use the white lead, while the black lead can be left unconnected. Connect the R (Red), G (Green), and B (Blue) signals to their respective analog inputs on the device or monitor. Take the CSYNC lead and connect it to the "external sync" input to the composite input panel.
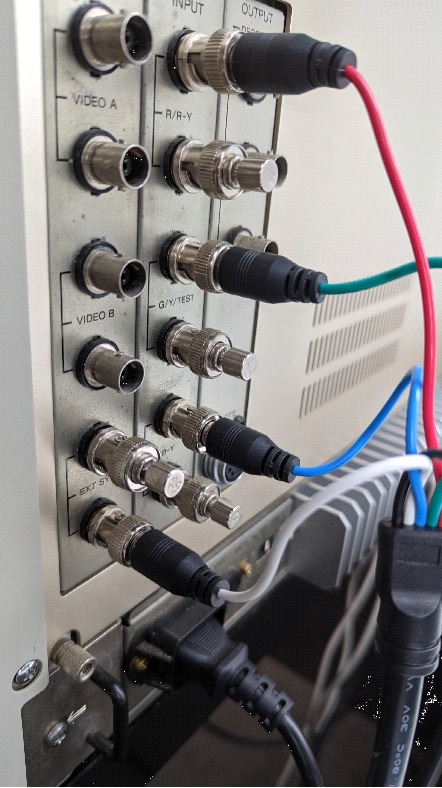
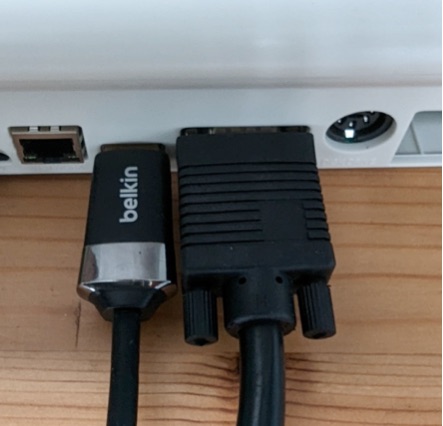
Connect the opposite end of the cable to the MEGA65's VGA port.
Example setup
A second monitor on the HDMI output will be useful for making the necessary adjustments to the configuration.
SCART and DB9 RGB
Connecting the MEGA65 running the Amiga 500 core to retro tubes such as Commodore and Philips RGB monitors is more straightforward than on professional monitors. Make sure you are configuring the core as described above: VGA: 15 kHz with CSYNC
SCART
For connecting your MEGA65 to a Commodore 1084S or Philips CM8833 monitor with a SCART input you can use a MiSTer VGA to SCART cable like this one:
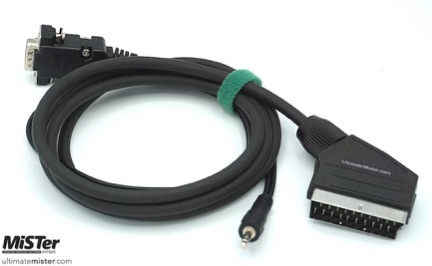
See here for where to purchase and availability and also make sure that you understand the importance of buying a cable that has a built-in resistor versus simple "pass-through" cables: https://www.retrorgb.com/beware-of-mister-scart-cables.html
DB9 RGB
For the later Commodore monitors such as the 1084S-P1 or Philips CM8833 Mark II, these have a DB9 RGB input as pictured below:
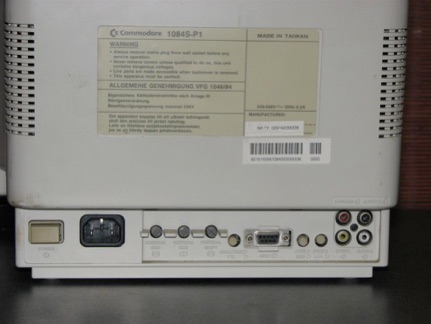
Use the following VGA to DB9 RGB cable which can be found on eBay (example from Australia, adjust to your country).